The world’s best homemade baked beans – paleo, vegan, vegetarian, GF, low carb, low fat

This is one of my favourite recipes for a healthy version of baked beans. Without all the hidden nasties like excessive sugar and salt, these beans come in their own beautiful homemade tomato and herb sauce – perfect to use in any way you would use regular baked beans from a can. If you make this using pulses from a can or carton, the whole thing only takes about 15 minutes to cook. If choosing to make this recipe with dried pulses as we do, you’ll need to do a little pre-preparation before following the below method: pre-soak the dry beans in a large pot of water overnight, then boil them over a low heat for 2-3 hours – don’t worry about having to watch the pot in this time, as long as you’re in the general vicinity to make sure the pot doesn’t either go dry or boil over you can pretty much ignore it until its done. As long as the heat is set such that the beans keep on a low simmer, still bubbling and boiling gently, it’s happy on it’s own. I tend to make one huge batch of beans like this to portion into little bags and freeze until needed, which I can defrost in the microwave then use whenever.

But back to the beans…

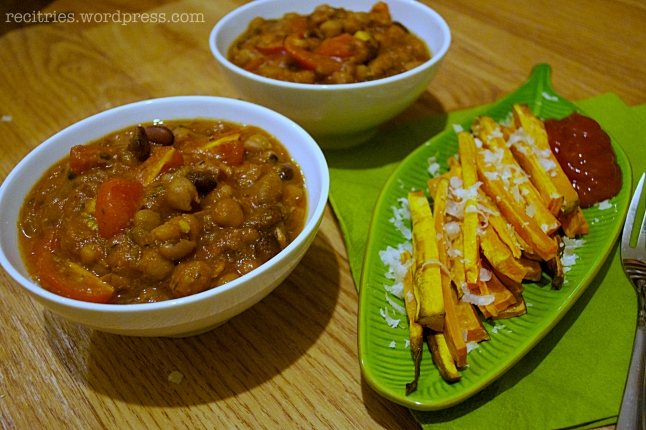
You could have them as beans on toast…. or atop a baked potato… or with sweet potato chips…

homemade-beans-chips

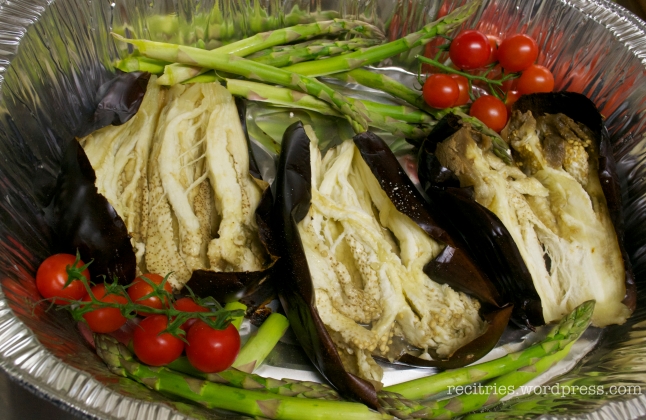
or pop a whole aubergine (eggplant) into the oven for an hour (200 degrees C)….

aubergiene-1

… cut it in half, surround it with your favourite veggies…

aubergiene-2

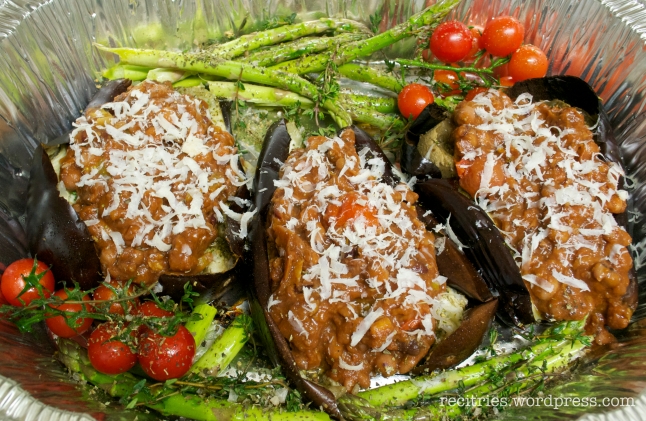
… top it with baked beans, parmesan and a few herbs, then bake again for 20 minutes…

aubergiene-3

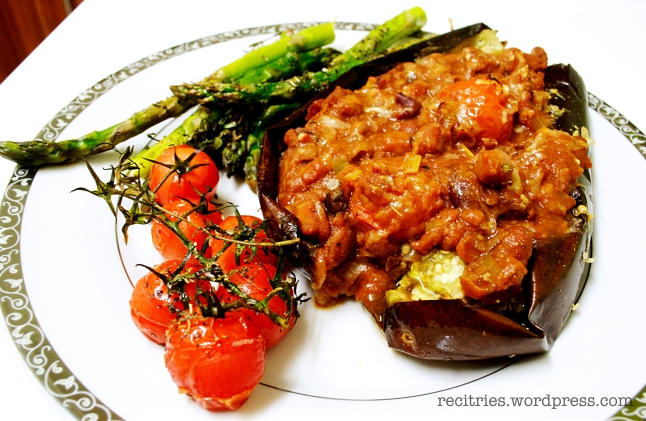
to make this delicious meal…  there are hundreds of possibilities.  and all of them delicious 🙂

You won’t regret making these… unless you really hate beans.  In which case feel free to order pizza or something.

Ingredients – serves 4

  • 4 cans or cartons of pulses of choice, drained – red kidney beans, chick peas, butter beans, whatever you prefer (if using dry pulses, use 1/4 cup of each and follow instructions in the blurb above to slow-cook before you follow the rest of the recipe.  NB: raw red kidney beans are actually poisonous! I would recommend using those from a can to avoid issues with undercooking)
  • 1 packet (300ml) passata
  • 1/2 red onion, finely diced plus 1-2 tsp oil to fry, or 4 tbsp good quality crispy onion pieces (anything in the ingredients other than onion, flour, salt, oil then it’s no good)
  • 1/2 punnet cherry tomatoes (about 150g)
  • 2 tbsp dried thyme or oregano
  • 1/4 tsp garlic powder
  • 2 tbsp tomato ketchup (really enhances tomato flavour)
  • 1/2 tsp spice mix of choice, e.g. mild curry powder or cajun, whatever (just adds to background flavour so it’s fairly flexible, most indian or mexican blends also work well)
  • Salt to taste – start at 1/2 tsp.  Canned beans have salt added and so will need less than dry pulses boiled at home
  1. if using red onion, heat oil in a saucepan then fry until starting to brown at the edges.
  2. Put everything except the salt into the saucepan and stir well.
  3. Bring to the boil, turn down the heat then cover and simmer for 10 minutes or so, until the cherry tomatoes pop and the sauce is bubbling nicely.  Season with salt to taste, then serve.  Enjoy 🙂

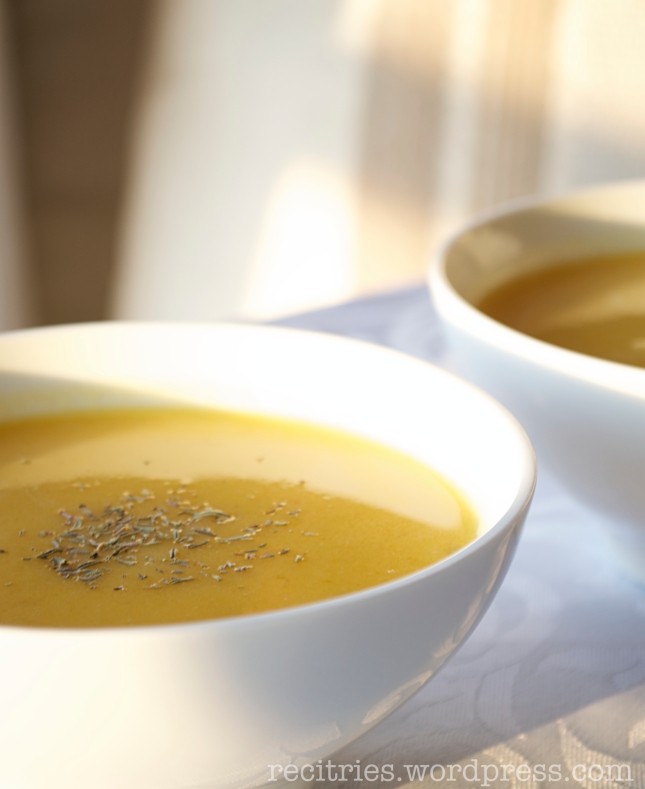
the ultimate comfort food: spiced butternut squash soup

It’s almost autumn.  I say almost because I refuse to let go of the last glorious days of one of the few actual summers we’ve had in Britain during my life… but alas the leaves are turning funny colours and falling off, conkers are everywhere and it’s the season for squash and it’s cousin the pumpkin.  Which brings me to one of my favourite parts of autumn – making this soup.  It is by far the best way I know of to eat a butternut squash, requires no pre-roasting (unless you want to get all fancy – it does enhance the flavour but perhaps not enough to spend an extra 1-1.5 hours cooking it), and has *the* most wonderful taste – a subtly warming, creamy smooth, lightly sweet, slightly tart golden bowl of happiness, waiting to give your senses a big hug.  The ultimate comfort food – tastes every bit as warm, reassuring and delicious as others but is as good for you as it makes you feel eating it.  This has to be one of my favourite soups of all time, which is saying something when you have tried as many soup recipes as I have 🙂

spiced-butternut-squash-soup

Ingredients – serves 2

  • 400g butternut squash, peeled, diced
  • 2 tbsp crispy onion pieces (good quality only, nothing with dextrose and additives please – just onion, oil, salt, flour) OR half a small onion, diced
  • 1 tbsp olive oil 
  • 1 vegetable stock cube
  • around 600ml water, or a bit more than the stock cube recommends
  • 1 tsp dried thyme
  • 1/2 tsp curry powder
  • 2 tbsp natural yoghurt or creme fraiche (if substituting, use a non-dairy yoghurt with some tartness (i.e. not like coconut milk), or add 1tsp of lemon juice)
  1. heat the oil in a saucepan. If using fresh onion add it now and fry until golden.  
  2. Tip the squash into the saucepan, and add the curry powder.  Fry for a few minutes.
  3. add all of the remaining ingredients except the yoghurt to the pan and bring to the boil.  Simmer for 5-10 minutes until the squash is tender and cooked through.
  4. Remove from the heat.  Blend using a stick blender or in a jug type, then stir through the yoghurt.  Serve immediately.  Enjoy 🙂  

healthy fig & almond slice – paleo, GF, sugar free, low fat (yes, really)

This is a recipe I developed as a guilt-free alternative to one of my favourites, the raspberry and almond slice from Costa coffee shops.  Theres something oh-so-delicious about that rich, dense almond base with those swirls of jam, and the delicate flakes of almond on top… the first version of this recipe I made was very similar, but contained no sugar except for the jam (plus I had no flaked almonds in the house), and it doesn’t have that odd layer of doughy pastry at the bottom which I don’t really like.  It was so good that before the batch finished I made it again, this time a double portion and without any added sugar at all – just fresh, sliced figs baked into the top.  The recipe for both can be seen here.

In case you’re wondering how on earth this can taste like a dessert without sugar in it – that’s because of stevia.  Stevia is a natural sweetener they have been using for generations in South America, its from a plant, tastes 300 times sweeter than sugar in its pure form, and contains no calories.  Too good to be true, right? I thought so, especially because there’s a bit of an art in baking with it to get the sweet balance right, and the first few times I tried it didn’t work so well. But I think I’m getting the hang of it now, because the last few things I’ve made have been great 🙂  But don’t worry if this doesn’t convince you, I’ve given the option to use regular sugar instead.  Hurrah!

Did I mention this recipe also has no added fat, and is so simple a child could make it? yup.  yesterday was a good day 🙂

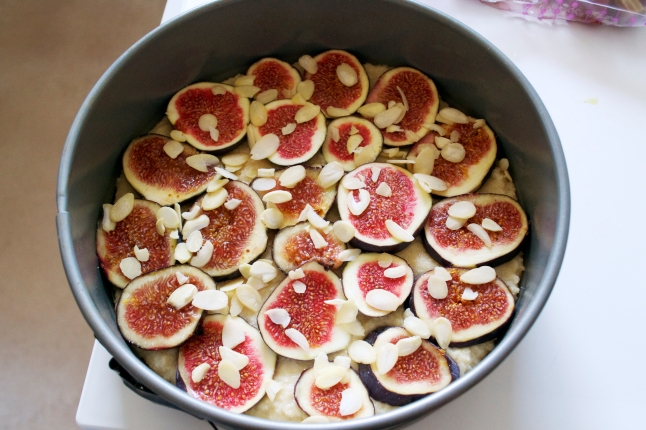
figalmond1

Here it is before going into the oven 🙂

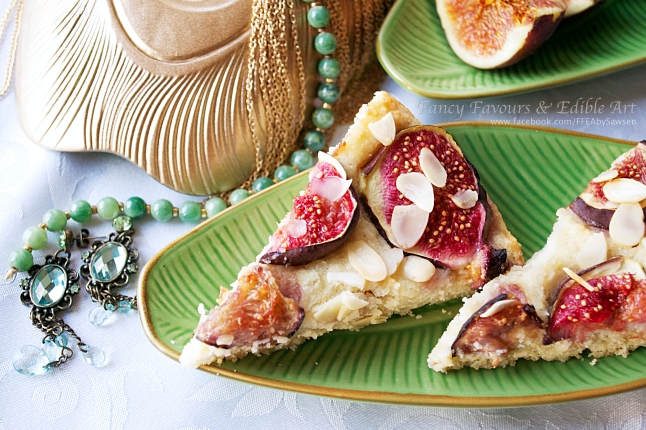
figalmond15_Fotor

I couldn’t resist giving it a little styling – you can see more pictures on my Facebook page, Fancy Favours & Edible Art

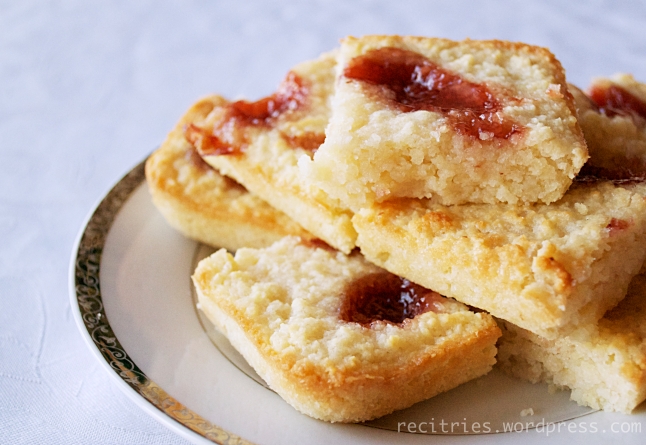
paleo-raspberry-almond-slice

and here is the first version, the raspberry jam original 🙂


Ingredients – makes one 9″ tart

  • 2 cups ground almonds (480ml as measured in a measuring jug.  Don’t look at me that way, I’m not weird)
  • 6 medium egg whites, or 12 tbsp carton egg whites (if you can’t find these you could use 4 whole eggs)
  • 2 tsp oil based almond essence 
  • 1/3 cup plus 2 tsp (90ml) of stevia based sweetener with erythritol (in the UK the brand name for this is Truvia) – important it has the weight and granular appearance of sugar.  NB: Truvia “baking blend” is different – its sweeteners plus sugar and you will have to adjust amounts if you use that one.  If you want to use real sugar, its 2 cups (480ml).
  • 1/2 tsp baking powder
  • 2 tbsp flaked almonds
  • 3 fresh sliced figs to top, or 4 tbsp raspberry jam of choice for the sweeter traditional alternative
  1. Preheat the oven to 170 degrees C fan, 180 C for regular ovens or whatever your equivalent gas mark
  2. Line a 9″ round or 8″ square pan with baking paper, then brush with oil or spray with cooking spray.  This recipe sticks if you don’t.  I used a loose bottom pan, which I recommend for ease if you have one.
  3. mix the almonds, sweetener, egg, baking powder and almond essence together in a bowl until well combined, then pour into your prepared pan and spread evenly.  Top with dollops of raspberry jam, or slices of fig, then sprinkle over the flaked almonds, as in pic 1.
  4. Bake for about 20-25 minutes or until a cake tester or fork comes out clean.  Allow to cool on a wire rack, then remove from the tin and peel away the paper.

Enjoy! 🙂

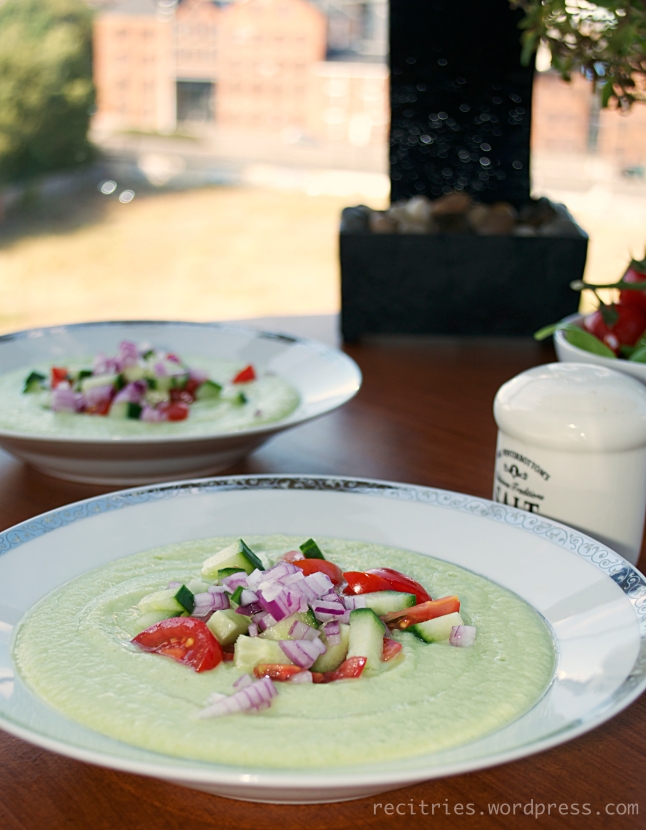
chilled avocado & cucumber soup

Now I know what you’re thinking, believe me, when I first saw this recipe I was thinking the same… “a cold soup? why on earth would anyone want to willingly eat a COLD soup? eeewwwwwwwww” (insert other expressions of distaste here)… I’d seen many recipes in the past, and no matter how great people told me they were, I wasn’t interested.  Until this week, when I finally managed to overcome my prejudices and make this – one of the most incredible, velvety smooth, cooling, filling dishes I’ve ever had.  Ahem… I’ll take a side of my words with that soup, to go. Think of it like a smooth pureed more subtle version of guacamole (which I love – if made correctly and not from those awful jars of bright green sludge from the supermarket it is delicious), or like a velvety thick green smoothie you eat with a spoon.  The crunchy little salad on the top gives it that extra “pop” – the punchy flavours a perfect complement to the soft creaminess of the soup. This is a great dish for summer, when the sun is baking and you really don’t want to eat anything hot.  And while there is more peeling and chopping than some of my recipes, there is NO COOKING WHATSOEVER, making this one of the fastest things to make on this whole blog 🙂 Adapted from a recipe by Gordon Ramsay in his Fast Food book.   avocado-cucumber-soup my first time putting a big photo in – dyu like it? 🙂 Ingredients – serves 2

  • 1 ripe avocado, stoned and peeled, and roughly chopped
  • 1 large cucumber, 1/4 finely diced for garnish, the rest peeled and roughly chopped
  • a large handful of baby plum tomatoes, or one large one, finely chopped
  • 1/4 of a red onion, finely chopped
  • 4 tbsp yoghurt of choice (if using soy please make sure it has no flavour or strong aftertaste)
  • 1 pinch garlic powder
  • 4 tbsp lemon juice
  • 1 tbsp olive oil
  • Salt & pepper to taste
  1. place the avocado, yoghurt, cucumber (except garnish), garlic powder, olive oil and 2 tbsp of the lemon juice in a jug blender, or a deep cup/ bowl if using a stick blender.  Blend until a smooth, velvety puree has been obtained and all the lumps are long gone.  Season with salt and pepper to taste – at this point it might taste a little bland but that all changes with the salad on top 🙂
  2. prepare the salad to top: mix together the tomatoes, remaining cucumber, red onion and the rest of the lemon juice, making sure the lemon coats everything well.  Add a little salt, this helps reduce the heat of the onion and brings the flavour of the tomatoes out.
  3. Plate the soup as shown, garnishing with the salad on top.  Enjoy!

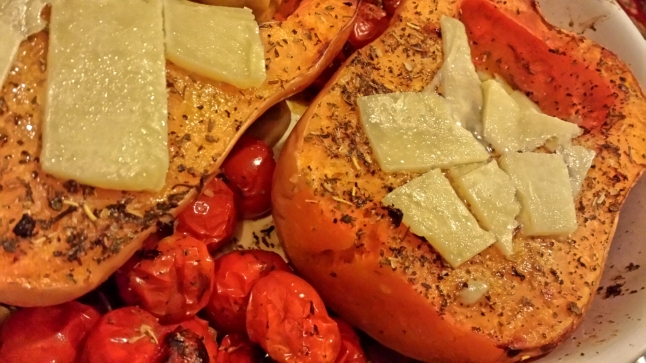
Oven roasted butternut squash with cherry tomatoes

This was one of the most delicious and guilt free dinners I remember having in a long time. With only a handful of fresh, natural ingredients, when cooked right this will make you wonder why you ever looked twice at a baked potato, or even sweet potato. The trick to getting the flesh of the squash beautifully sweet and tender and cooked through is to steam it beforehand; it cuts the oven time in half, ensures an even cook and means you can put everything in the oven at once and it’ll be ready together, as opposed to finding your squash raw in the middle, or your tomatoes burnt into little black inedible biscuits, or if you’re really unlucky, both.

The flesh of the squash has a slightly sweet tinge to its taste, which goes well with strong flavours such as tomato, thyme, lemon and garlic, or warm spices for an eastern twist. If you wanted to change this dish up I would steer clear of more subtle, creamier flavours as the dish wouldn’t be savoury enough, with nothing to cut through the mild sweetness.

image

Ingredients – serves 2
One whole, large butternut squash, halved and deseeded
1 medium sized leek, sliced (sub: bunch of spring onions /scallions)
1 punnet (about 300g) cherry tomatoes of choice – good quality ones please
2 tsp dried oregano or thyme
1/8 tsp dried garlic powder
2 tbsp olive oil
Salt & pepper
Optional – shaved parmesan or hard cheese to top

1. Steam the squash. You can do this in a steamer on the hob, or in the microwave like we did. I put it in a large bowl, covered in cling film which I pierced a couple of times. About 10 minutes later the whole thing should be soft and squishy on the outside, with possibly a little bit of uncooked flesh in the very centre if your two halves were touching. This is alright. Any more than 1/4 uncooked and you’ll need to steam for longer.
2. Arrange the two halves in an ovenproof dish, open as shown. Sprinkle around the leeks, then tomatoes, then drizzle on the olive oil and herbs/ garlic. Season with salt & pepper then bake in the oven at 200 degrees Celsius  for about half an hour.
3. Your dish is ready when everything is cooked, soft, golden looking and the tomatoes have burst and look delicious. Remove from the oven, top with cheese and serve immediately.
Enjoy!

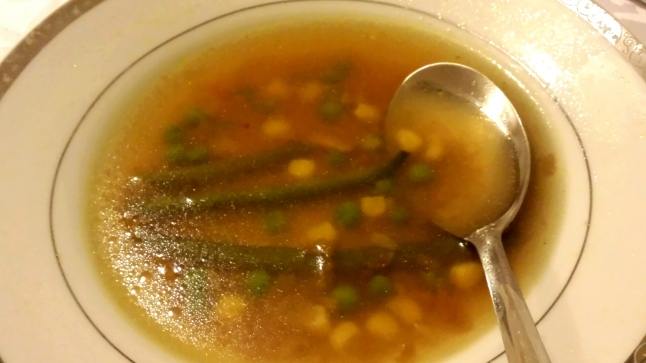
Speedy simple vegetable broth

This is a simple, light vegetable broth which can be made in about 5 minutes flat – as we did tonight at 1am when we randomly felt hungry. It has a clean taste despite the potentially strong flavours that go into it, because it has so little of each. It’s also a great choice when feeling under the weather or a little nauseous because of its subtle taste and the vitamin boost from the veggies. In our case we just had it to be able to eat without getting overstuffed and being too uncomfortable to sleep right afterwards!

You can use any vegetables you have in this, for speed I used what I had in the freezer. Mix it up, see what you come up with 🙂

image

Ingredients – serves 3-4
1 vegetable stock cube, or 3/4 litre freshly made vegetable stock plus 1 cup water
About 1. 25 litre of water (or a bit more than the stock cube instructions recommend, whatever that is- omit this water if using homemade stock)
2 tbsp high quality crispy fried onion pieces, or half a small onion, diced, fried in 1tbsp oil and with a little salt
1/3 cup each of frozen peas, sweetcorn, cubed swede and green beans, or other veg of choice

1. Put everything in a saucepan
2. Bring to the boil on a medium heat
3. Allow to boil for 5 minutes, testing to make sure the vegetables are done
4. Your broth is ready. Enjoy!

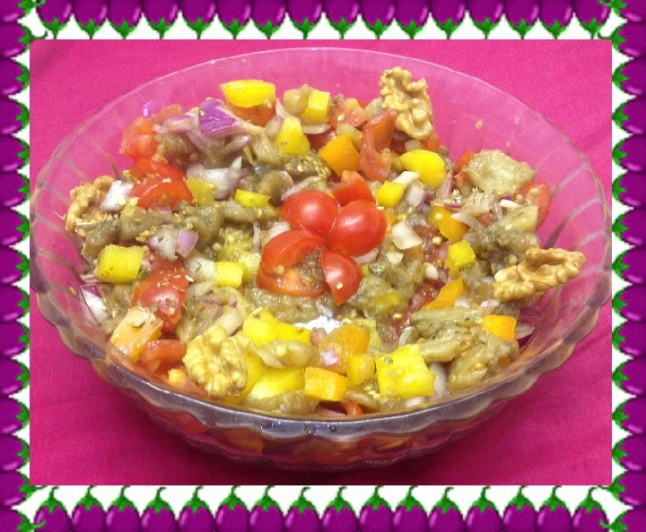
Roasted Eggplant (Aubergine) Salad

eggplant3

The best way to get the best flavour out of an eggplant is to roast it!

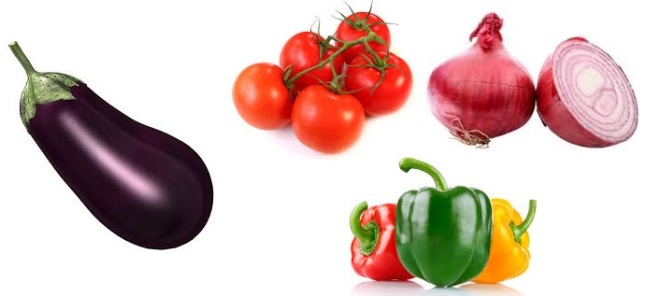
  • 2 medium or 3 small eggplants (aubergines)
  • 1 medium red onion, chopped
  • 2 bell peppers, chopped
  • 24 cherry tomatoes, chopped into fourths
  • 1/4 cup olive oil
  • 3/8 cup vinegar (preferably balsamic)
  • salt and pepper to taste
  • Optional garnishes: walnuts, feta cheese, dried mint or oregano

Pre-preparation:

1. If you plan to be around other human beings in the near future, marinate the chopped onion in a mixture of salt, vinegar, and water for a couple hours. This will calm down the onion flavour and also infuse it with a gentle flavour, rendering it Socially Acceptable. If not, don’t worry about it!

2. Heat the oven to 425 degrees F. Place the eggplant whole and unpeeled in the oven and roast uncovered it for an hour, or until the peel is burnt and wrinkly, and the inside is tender. You may want to turn it occasionally. (Note: It should look burnt but not smell burnt; if it smells burnt, it’s overcooked!)

3. After the eggplant cools slightly, peel it and discard the peel. Then, chop the eggplant into bite-size pieces. Place it in a colander and allow it to drain for an hour .

Preparation:

1. Toss ingredients in an aesthetically pleasing bowl. Adjust the seasoning as desired.

2. Top with garnishes, if desired.

Don’t worry too much about the proportions – salad is forgiving!

Wholesome living tip: Eggplants, tomatoes, and bell peppers are all nightshade vegetables, which means that some people may experience pain or inflammation with excess consumption. If you feel this might be you, or if you suffer from chronic pain, don’t eat these vegetables every day!

vegetables


Paleo sundried tomato, pepper and lemon burger buns

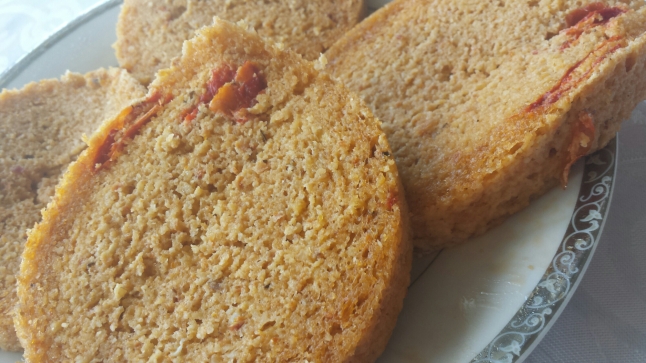
You may have seen my post a few days ago about the fastest & most awesome paleo bread in the universe – the paleo breakfast muffin, well this is a tweaked version of the recipe to be used as a bun for burgers. What burger is complete without the bread? Now you can have your bun and eat it too 😉

The major changes I made were to use a much larger mug (one of the extra large, half litre type ones) to make it a suitable size to hold burgers, and to reduce the fat in the recipe and substitute for sundried tomato puree. Because this is a double quantity of the mix the cooking time is upped considerably – make sure you don’t overcook and test for doneness the way you would a cake (see below).

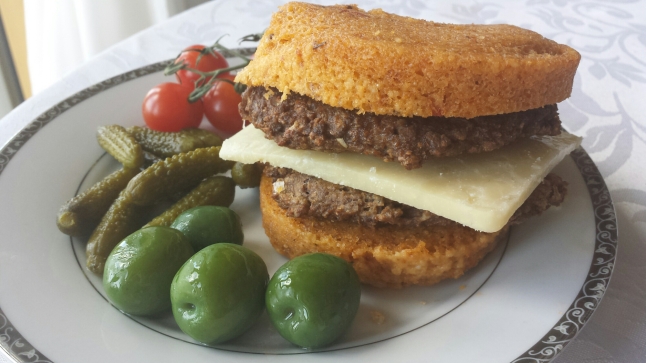
We served these with double layers of soy burgers and a thin layer of extra matured Canadian cheddar for a fast, filling & delicious lunch 🙂

image

image

Ingredients – makes 4 rounds as shown
2/3 cup ground almonds
2 whole eggs, cracked & beaten
1/4 tsp salt
1 tsp baking powder
2 tbsp coconut oil
3 tbsp sundried tomato puree
1/8 tsp oil based lemon extract, or the zest of half a lemon, grated
Optional – 1tsp orgeano
Optional – pieces of roasted pepper in oil
Optional – a few chilli flakes

1. melt the coconut oil in the microwave.
2. Mix in all the other ingredients until a smooth batter is obtained
3. Grease an extra large mug (or if you prefer, 2 regular ones) and pour the batter in. You’re looking for the batter to come about half way up in the mug, if you’re not sure what sizes you have.
4. Microwave on high for 4 minutes if using the extra large mug, or 90s with only one mug in the microwave at a time if using the small ones. Check the bread is done by sticking a cocktail stick into the middle of it, if any liquidy gunk is seen put it in for another 30s. If the stick comes out clean you’re good to go. Note: your microwave may work differently, adjust time if you need to. you’re looking for a springy, soft bread on the outside that’s cooked through to the middle. Allow to cool until you can handle it.
5. Slice and serve. Enjoy!

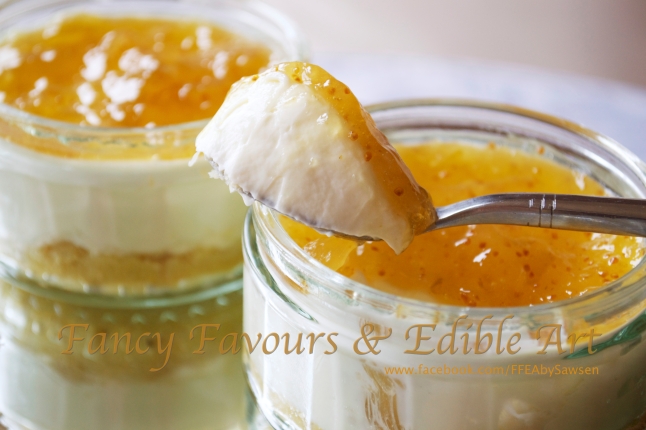
“Better for you” fig & lemon cheesecakes – with vegan, paleo, GF options

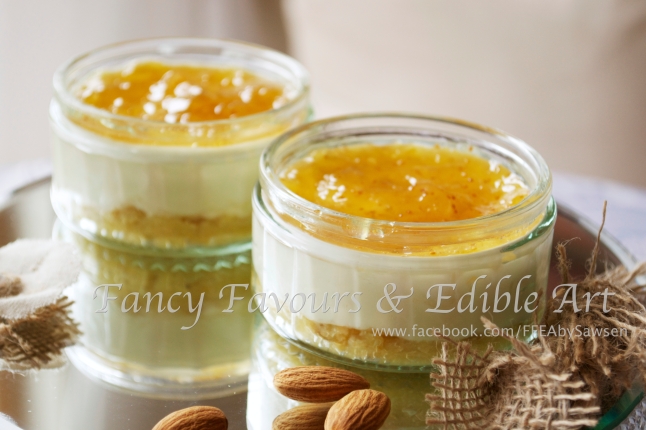
These cheesecakes are fast, easy, no bake, and have a few twists to the recipe that make them considerably better for you than their traditional counterparts.  I can’t say they’re strictly speaking healthy, because they still contain some fat and sugar, but all of the sugar is natural and unrefined (and there isn’t that much of it), and there is no double cream as is common in most no-bake cheesecakes.  The crust is also made without biscuits to avoid the white flour & refined sugar there.

You can do a lot of things with this recipe.  If you want to go more sugar free, substitute stevia in the base and cheesecake cream.  If you want to go vegan, use coconut oil in the base and coconut cream (leave a can of full fat coconut milk in the fridge overnight, then drain out the clear liquid leaving a thick cream) instead of the cream cheese, and for gluten/grain free swap out the oats for ground almonds.  For true paleo do both the vegan & GF modifications. Note though, you can’t use low fat cream cheese of the tub variety, because it contains thickeners such as locust bean gum which dissolve into soup as soon as you try to add any form of sugar. You have to use full fat cheese unless you’re sweetening with something like pure stevia.

However you make it, this stuff is so good you’ll be licking out the bowl, and finding an excuse to make this several times a week 🙂

You can see more photos of these on my Facebook page, fancy favours & edible art.

figlemon3 figlemon4yummmm 🙂

Ingredients – makes 4 ramekins

for the base:
3 tablespoons coconut flour
1 tablespoon oats (or ground almonds)
2 tbsp organic unsalted butter or coconut oil, melted
2 tbsp honey or 1 tbsp jaggery powder/ shakkar/ sucanat
for the cream:
300g cream cheese, full fat is a must unless you’re using pure stevia
2 tbsp honey or agave or sweetener of choice, to taste
1/4 tsp grated lemon zest or 1/8 tsp lemon essence
for the fig topping:
any no added sugar fig preserve (or preserve of choice – I used St. Dalfour High Fruit Content Spread which is delicious, has no added sugar and many flavours, and you can pick it up at most supermarkets)

1. melt the butter in a glass bowl, then stir in all of the other ingredients for the base until combined. Divide between 4 ramekins and pat down with the back of a spoon to achieve a flat, solid base.
2. tip the cream cheese into a bowl and soften it with a fork. Add the other cream ingredients and mix well, adjusting sweetness if desired until a light, creamy and subtly sweet mix is obtained- something predominantly creamy to offset the sweetness of the preserve.
3. Spread or pipe the cream mix evenly on top of the bases – no need to have refrigerated it in the mean time.
4. mix rounded teaspoons of fig preserve in a bowl until it is smooth and no lumps remain. spoon on top of the cream and spread in an even layer. Refrigerate until ready to eat, or enjoy now 🙂


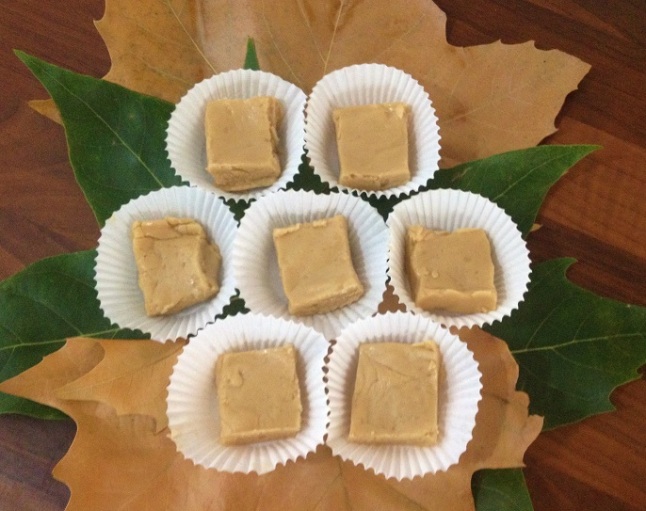
Pure Maple Fudge (dairy-free, vegan, refined sugar-free)

fudge

mapletable

A while back, I had the curious impulse to make dairy-free maple fudge. Was it possible? I had never even made fudge before. After great research and consideration, I embarked on this method. Fortunately, it was easy!

  • 4 cups coconut milk (or, for dairy option, 2 cups cream)
  • 4 cups pure maple syrup
  • 2 cups chopped walnuts
  • 2 liberal dashes salt (tip – salt brings out the sweetness)
  • candy thermometer

1. In a saucepan, simmer coconut milk over low heat until it is reduced by half (about 20 minutes). Allow to cool slightly. (If using cream, skip this skip and just put the cream in the saucepan and continue.)

2. Add maple syrup and salt. Fasten the candy thermometer to the side of the pot so that it is not touching the bottom. Over low-medium heat, cook to 238 degrees F, stirring occasionally with a wooden spoon.

Tips:

  • In the beginning, the coconut milk will be lumpy, but as you stir, it will become smooth.
  • As I learned, fudge is very temperature-sensitive, and so a thermometer is highly recommended unless you are an expert!
  • For an extra buttery flavour, you can add 1 tablespoon butter with the maple syrup, but it is not necessary – the maple fudge in the photo above was made without it.
  • If the weather is humid or rainy, cook to 240 degrees F.

3. Without stirring, gently remove from heat and pour into a bowl. Do not scrape the bottom of the pot. Allow to sit for 5 minutes without stirring.

4. Add walnuts and stir for 3-4 minutes or until the mixture holds its shape. This should require some effort, especially at the end.

5. Pour into a pan lined with wax paper. Smooth the top using a greased piece of wax paper.

6. Allow to cool. It will set as it cools. If the weather is humid, you may want to put it in the refrigerator. Slice when set.

Makes 16 small squares.

Enjoy!

One of the first responses this recipe got was, “Maple syrup is expensive!” Yes, it is expensive (at least in most places). This is not an everyday dessert but rather is worthy of a special occasion or to give as a gift. 

Also…throughout most of human history, desserts were special treats, not to be enjoyed every day. We are living in a very unnatural era, where cheap candy bars have become the norm. A dessert should be a little expensive and hard to obtain!

Based on World’s Easiest Maple Walnut Fudge (made with cream)

maple2